Never Soggy: Master Crispy Fried Pickles Every Time
Step aside, mundane snacks—there's a new champion in town ready to claim its rightful place at your table: perfectly crispy fried pickles. A true culinary marvel, these golden-brown bites offer a delightful contrast, with a satisfying crunch on the outside giving way to a warm, tangy, and juicy pickle within. Whether you're hosting a game day spread, looking for the ultimate party appetizer, or simply craving a savory treat, a well-executed fried pickles recipe is an absolute game-changer.
However, many a fried pickle enthusiast has faced the crushing disappointment of a soggy, greasy, or undercooked batch. The inherent moisture of pickles, combined with the challenge of deep-frying, can quickly turn a dream snack into a culinary nightmare. But fear not, pickle lovers! This comprehensive guide will equip you with all the tips, tricks, and techniques you need to banish sogginess forever and consistently achieve the crispiest, most flavorful fried pickles imaginable, right in your own kitchen.
The Unsung Hero: Why Preparation is Paramount for Crispy Fried Pickles
The journey to crispy fried pickle perfection begins long before the hot oil. The single most critical factor in preventing sogginess is effectively managing moisture. Pickles, by their very nature, are stored in brine and are incredibly wet, which is the nemesis of a crispy crust. Ignoring this crucial step is a surefire way to end up with a lackluster, steamed-out exterior.
Here’s how to set yourself up for success:
- Drain Thoroughly: Start by draining your pickles (whether spears or chips) in a colander for at least 15-20 minutes. This allows the excess brine to drip away naturally.
- Pat Dry, Meticulously: This is where the real work begins. Lay your pickle pieces out in a single layer on a plate or baking sheet lined with several layers of paper towels. Then, use more paper towels to gently but firmly pat every surface of each pickle until they are as dry as humanly possible. Don't be shy; you want to remove every speck of surface moisture. Some pros even let them air dry for another 10-15 minutes after patting. Think of it as creating a blank canvas for your breading.
Pickle Power: Spears vs. Chips
While the drying process is universal, your choice of pickle shape does influence the frying experience and final texture:
- Pickle Spears: Many aficionados prefer spears, and for good reason. Their shape allows for a substantial crunchy exterior while still retaining that satisfying, juicy pickle-y bite in the center. They’re robust enough to handle the frying process without falling apart and offer a great pickle-to-breading ratio.
- Pickle Chips: If you prefer a thinner, crispier experience, pickle chips are an excellent choice. If you're starting with whole pickles, aim for uniform 1/4-inch slices for even frying and a consistent pickle-to-batter ratio. Just remember, due to their smaller size and thinner profile, pickle chips will fry much faster than spears, so keep a close eye on them to prevent burning. Regardless of your preference, remember the golden rule: drain and pat them bone-dry!
The Art of the Perfect Crust: A Seasoned Three-Step Breading Process
Once your pickles are perfectly dry, it's time to build that irresistible crunchy shell. Our ultimate fried pickles recipe employs a classic three-step breading process, but with a crucial flavor-enhancing twist that elevates it beyond the ordinary.
Step 1: The Flavorful Flour Dredge
The initial coating of flour serves a vital purpose: it provides a dry, starchy surface for the wet egg wash to adhere to. But we're not stopping at mere adhesion. This is your first opportunity to infuse deep flavor.
- Foundation: Use good old all-purpose flour.
- Flavor Boost: Whisk in seasonings like garlic powder and a generous pinch of salt. Don't be afraid to get creative here! Experiment with a dash of onion powder, a smoky paprika, a hint of cayenne pepper for a kick, or even a blend like Old Bay for an unexpected savory depth. This seasoned flour lays the groundwork for a truly delicious bite.
Step 2: The Binding Egg Wash
The beaten egg acts as the crucial "glue" that binds the dry flour coating to the final, crunchy breadcrumbs.
- The Binder: Simply whisk 1-2 large eggs in a shallow dish until well combined. You can add a splash of milk or water to thin it slightly if desired, but it's often not necessary.
- Even Coating: After dredging in flour, dip each pickle piece into the egg wash, ensuring it's completely coated. Let any excess drip off before moving to the next step.
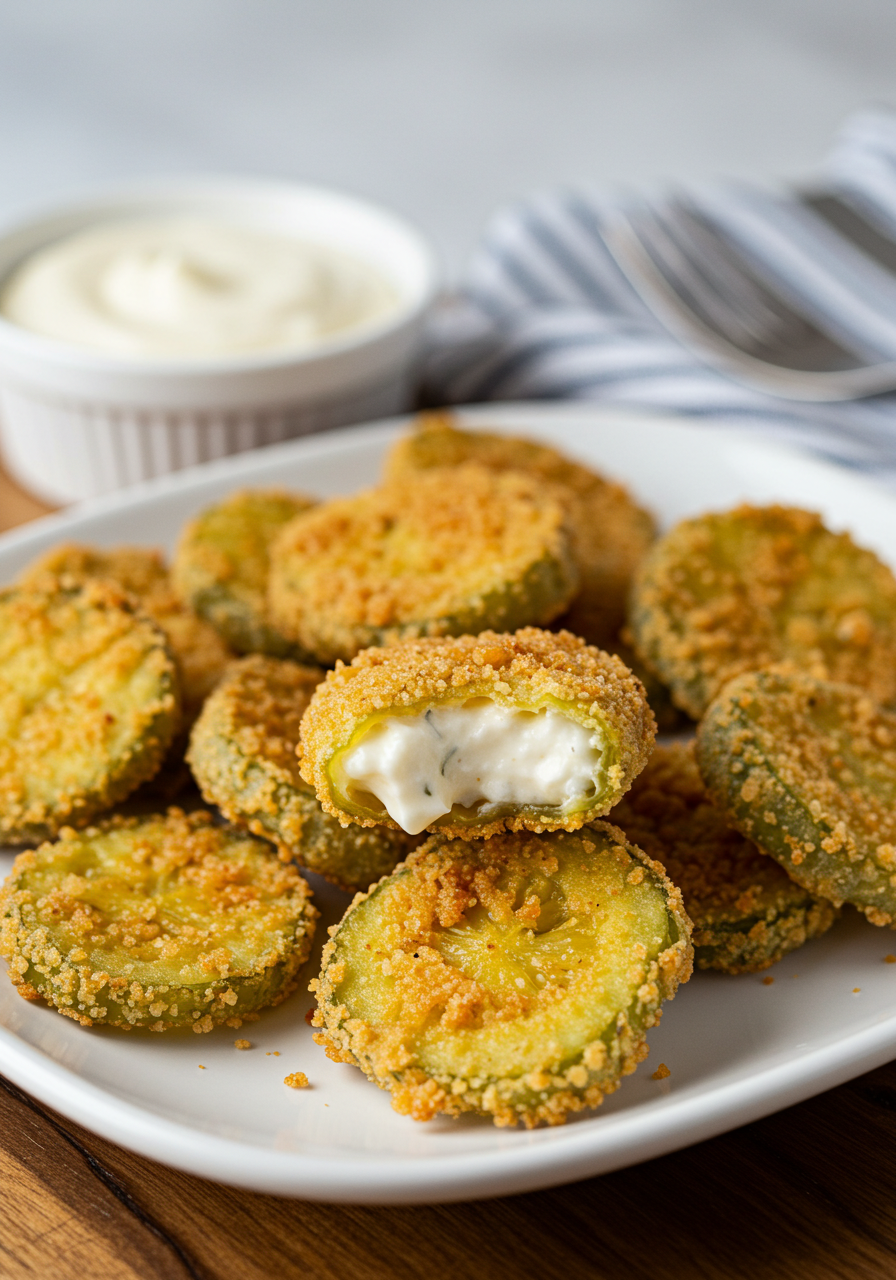
Step 3: Panko Power for Ultimate Crunch
This is where the magic happens for that deeply satisfying crunch. While Italian breadcrumbs are an option, panko breadcrumbs are our undisputed champion for this fried pickles recipe.
- Why Panko? Panko breadcrumbs are coarser and flakier than traditional breadcrumbs, offering significantly more surface area. This irregular shape creates a lighter, airier, and incomparably crispier texture that also absorbs less oil, resulting in a less greasy finish.
- Technique: Roll the egg-coated pickles thoroughly in the panko, pressing gently to ensure an even, thick coating. You want every inch covered. Place the breaded pickles on a clean baking sheet or wire rack as you work, ensuring they don't touch, to prevent sticking and maintain the integrity of the coating.
Mastering the Fry: Heat, Oil, and Golden Perfection
With your pickles perfectly prepped and breaded, it’s time for the final, exhilarating step: frying. Achieving that iconic crunch, reminiscent of your favorite restaurant-style fried pickles, hinges on mastering your frying technique. For more in-depth insights into achieving that perfect golden crisp, check out our guide on
Fry Pickles Like a Pro: Get Ultimate Crunch at Home.
Choosing Your Oil Wisely
The right oil is crucial for taste, texture, and safety.
- High Smoke Point is Key: Opt for vegetable oil. It has a high smoke point, meaning it can reach the necessary frying temperatures without burning or imparting unpleasant flavors. Other excellent choices include canola oil or peanut oil. Avoid olive oil, as its low smoke point makes it unsuitable for deep frying.
- Generous Amount: Use enough oil to submerge the pickles fully, or at least halfway, allowing for easy flipping.
Temperature Control: The Goldilocks Zone
Frying at the correct temperature is non-negotiable for crispy, non-greasy fried pickles.
- The Ideal Temperature: Aim for 350-375°F (175-190°C). An instant-read thermometer is your best friend here.
- Too Cold: If the oil isn't hot enough, the breading will absorb too much oil, resulting in greasy, soggy pickles.
- Too Hot: If the oil is too hot, the exterior will burn before the inside is properly heated and the crust sets, leading to an unpleasant texture.
Frying Technique for Success
- Don't Overcrowd: Fry in small batches. Overcrowding the pan will drastically drop the oil temperature, leading to greasy pickles. Give each pickle ample space.
- Golden Brown Perfection: Fry for 2-4 minutes per batch, flipping halfway through, until the pickles are beautifully golden brown and crispy. Pickle chips will cook faster than spears.
- Drain Immediately: As soon as they're golden, remove the fried pickles with a slotted spoon or spider and place them on a wire rack set over a baking sheet lined with paper towels. The wire rack allows air to circulate, preventing the bottom from becoming soggy. A sprinkle of flaky sea salt right after frying enhances their flavor!
The Full Experience: Dipping, Serving, and Savoring Every Bite
Your perfectly crispy fried pickles are hot and ready. Now, let's complete the experience with irresistible dipping sauces and smart serving tips.
The Essential Dipping Sauce Duo
Who can resist a side of creamy ranch with their fried pickles? It's a classic pairing for a reason. But for an extra kick, elevate your ranch:
- Classic Ranch: Always a crowd-pleaser. Serve it chilled for the perfect contrast.
- Spicy Ranch: Stir in a few dashes of your favorite hot sauce (Sriracha, Tabasco, Frank's RedHot) into your ranch dressing. Adjust to your preferred level of heat for a zesty, fiery complement to the tangy pickles.
- Beyond Ranch: Don't limit yourself! Other fantastic dipping options include honey mustard, zesty comeback sauce, garlic aioli, sriracha mayo, or even a sweet chili sauce.
Serve Immediately, Enjoy Fully
Like any fried food, fried pickles are at their absolute peak of perfection the moment they emerge from the oil. The contrast between the scorching hot, crispy exterior and the warm, juicy interior is truly something special. So, gather your hungry crowd and serve them hot!
Leftovers (If There Are Any!)
If by some miracle you find yourself with leftover fried pickles, you can certainly save them, but choose your reheating method wisely to preserve that precious crispness:
- Storage: Store cooled fried pickles in an airtight container in the refrigerator for up to 2-3 days.
- Reheating: The only way to revive their crispness is in the oven. Preheat your oven to 350°F (175°C). Place the fried pickles on a wire rack set over a baking sheet (this is crucial for air circulation) and bake for 8-12 minutes, or until heated through and re-crisped.
- NEVER Microwave: We cannot stress this enough ��� do NOT microwave fried pickles. The microwave will turn that beautifully crispy breading into a sad, rubbery, and soggy mess. Avoid at all costs!
If you've ever dreamt of recreating that legendary appetizer from your favorite steakhouse, you're in good company. Many fried pickle enthusiasts are inspired by popular versions, such as those found at Texas Roadhouse. For a deep dive into cloning that specific crowd-pleaser, explore our article:
Texas Roadhouse Fried Pickles: Make the Iconic Recipe.
Conclusion
Armed with these expert tips and a foolproof fried pickles recipe, the days of soggy disappointment are officially behind you. From meticulous moisture removal to flavorful breading and precise frying techniques, every step contributes to the ultimate crispy, tangy, and utterly addictive snack. So, grab your pickles, heat up that oil, and get ready to impress yourself and everyone you know with a batch of homemade fried pickles that are truly never soggy – just perfectly golden, crunchy, and bursting with flavor every single time. Happy frying!